NEW
Such A Show Off
Such A Show Off
Couldn't load pickup availability
Introducing the ultimate solution for creating fuller, thicker brows and lashes: our Lash Lift & Brow Lamination Kit!
With our gentle, super effective formula, you can say goodbye to thinning and patchiness, unruly hairs, and the daily struggle of using a lash curler and brow makeup. Our kit will help camouflage these issues, fix the overall shape of your brows and lashes, and give you fabulous results that last up to 6 weeks.
Don't let thin, uneven brows and lashes hold you back any longer. Try our Lash Lift & Brow Lamination Kit today and see the amazing transformation for yourself!


Gentle formula packed with keratin and collagen
Our lifting lotions contain gentle ingredients that are kind to the skin and hair. Rich in keratin and collagen, they promote healthy hair growth and shine while giving you the perfect lashes and brows lasting up to 6 weeks! Get your lashes and brows lifted while making them naturally stronger and healthier!
Collapsible content
Ingredients
#1Perm: Polyacrylamide, Thioglycolic acid, Propylene glycol, purified water.
#2Fixation: Polyacrylamide, purified water, Propylene glycol, Methylparaben.
#3Nutrition: Propylene glycol, Methylparaben, Collagen, purified water.
#4Cleanser: Methylparaben, purified water.
Lash Adhesive: Polyacrylate, Emulsifying agent, Deionized water, Ammonium Sulfate.
Care Information
For the next 48 hours avoid getting your lashes wet. Do not put on any mascara. You may shower and wash around the area of the eyes. You do not want to get them directly wet. A few splashes of water will not be harmful. However, submerging them in water will cause them to fall in areas. After 48 hours you can resume your normal routine and begin wearing mascara and wetting your lashes. If your lashes did not lift, wait 3 weeks before doing the process again. Lashes are very sensitive in this state. Similar to getting your hair done, there are a few things you need to do to ensure your lashes last the entire 3 months with the curl.
How to use
Before you begin you will need:
Paper towels or cotton rounds for cleaning
Cling film (plastic wrap)
Process for lash lift
Step 1: Clean your eyes of any oil, dirt, or makeup. Cover bottom lashes with the 24k gold eye patch.
Step 2: Apply the lash adhesive to the back of the curling rod to secure the curling rod to your top lash line. There should be no space between your lash line and the curling rod.
Step 3: Once secured to the lash line, apply adhesive to the top of the curling rod.
Step 4: Once the adhesive is tacky, stick your lashes to the curling rod separately to ensure they're not clumpy. Apply more adhesive to any lashes lifting away from the rod.
Step 5: Apply No.1 perm solution using a black applicator from the lash tools. Avoid getting too close to the lash line. Refer to the photo for accuracy. No.1 perm solution will soften the lashes so they can mold to the shape of the curling rod. Notice how No.1 perm solution is applied to the middle of the lash and not the waterline or tips of the lashes. Wait 10 minutes for No.1 perm solution to set. Apply either cling film or a cotton round over the eye while it sets. Clean off any access No.1 perm solution before applying No.2 setting solution.
Step 6: Apply No.2 setting solution with a clean black applicator from the lash tools. No.2 is the neutralizing step. It will hold the shape of your lashes up and curled. Refer to the photo for accuracy. Wait 10 minutes for the No.2 setting solution to set. Apply either cling film or a cotton round over the eye while it sets.
Step 7: Remove the No.2 setting solution with a clean cotton q-tip or a clean black applicator from the toolset. Use No.3 keratin oil to saturate the lashes. Leave the oil on for 5 minutes.
Step 8: Remove curling rod using No.4 cleansing solution. Brush your lashes with a spoolie and let them dry.
Process for brow lamination
Step 1: Apply No.1 perm solution across brow hairs using a black applicator from the lash tools. Wait 10 minutes for No.1 perm solution to set. Apply either cling film or a cotton round over the eye while it sets. Clean off any access No.1 solution before applying No.2 setting solution.
Step 2: Brush your brow hairs up. Use the spoolie to shape the top of the brows to create your desired shape.
Step 3: Apply No.2 setting solution with a clean black applicator from the lash tools. No.2 is the neutralizing step. It will hold the shape of your brows. Brush your brow hairs into your desired shape again. Wait 10 minutes for the No.2 setting solution to set then cover brows with cling film.
Step 4: Remove the No.2 setting solution with a clean cotton q-tip or a clean black applicator from the toolset. Apply No.3 keratin oil to your brows. Leave the oil on for 5 minutes.
Step 5: Use No.4 cleansing solution to remove any excess product. Brush and dry brows.
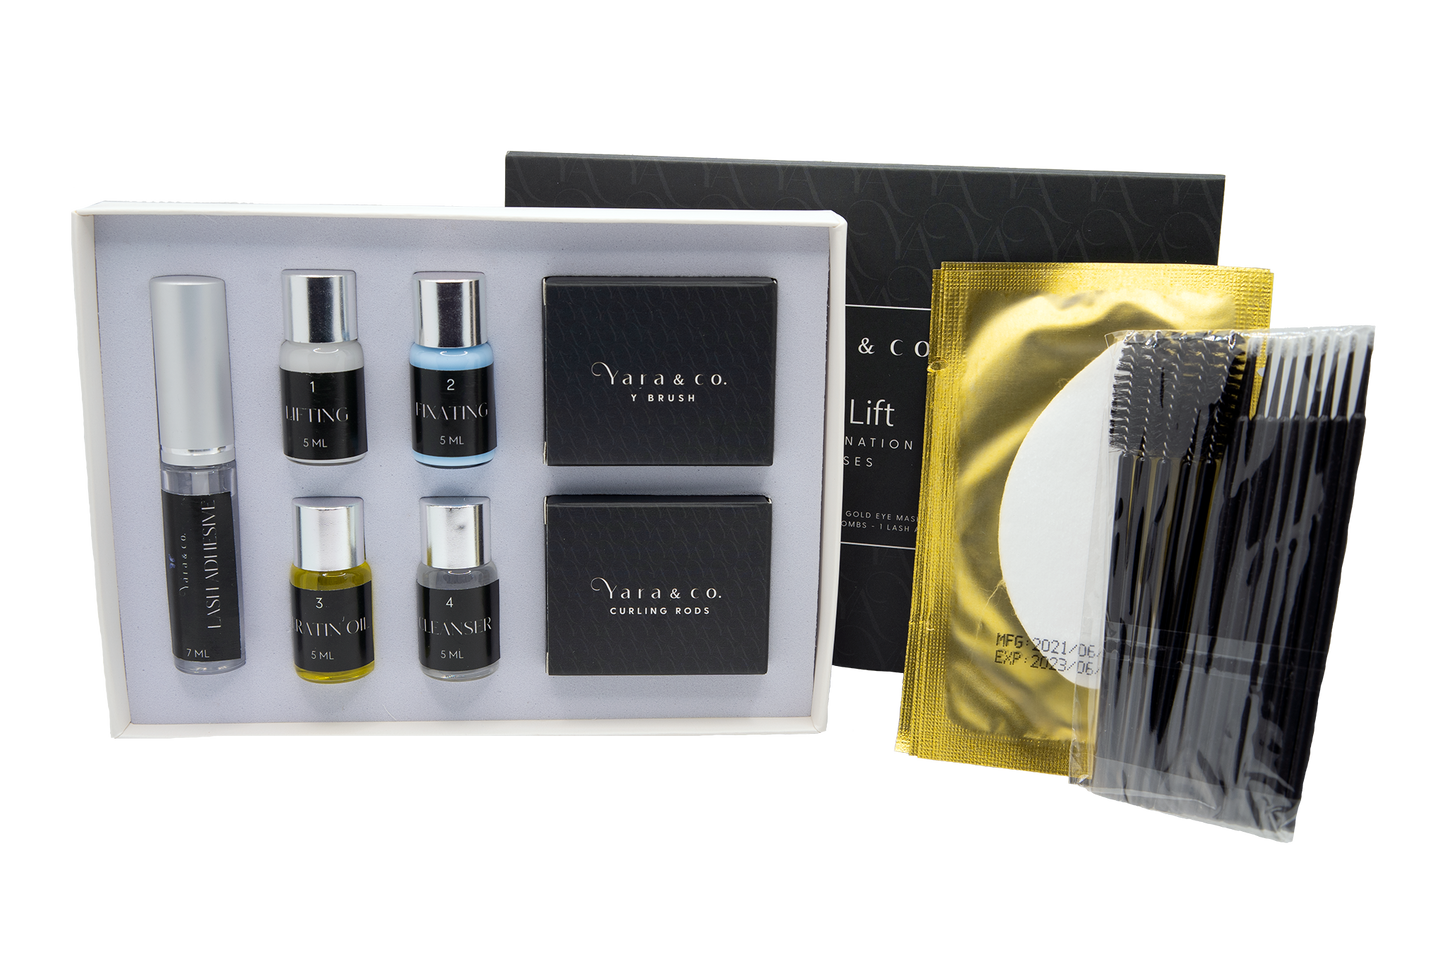
What's Inside
5 curling rods
5 24K gold eye mask
4 solutions
3 eye pads
3 cleaning combs
1 lash adhesive
Safety Precautions
Please read carefully before using
Please remove contact lenses before using this product around the eyes. Make sure the solutions do not touch your skin. If you have red eyes or any other eye conditions, please stop use immediately. If the solutions get into your eyes or cause irritation, immediately flush your eyes with cool water for 15 minutes and seek medical attention. Please keep products in this kit away from children at all times.
If you have sensitive skin or are prone to reactions, do a patch test before using. Please keep all products away from direct sunlight to avoid damage.
The manufacturers, importers, and distributors are not responsible for misuse and damage caused by this product.


